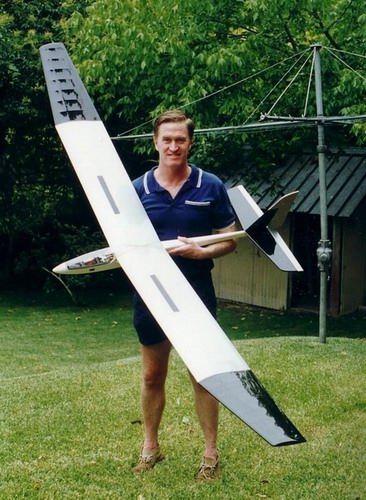
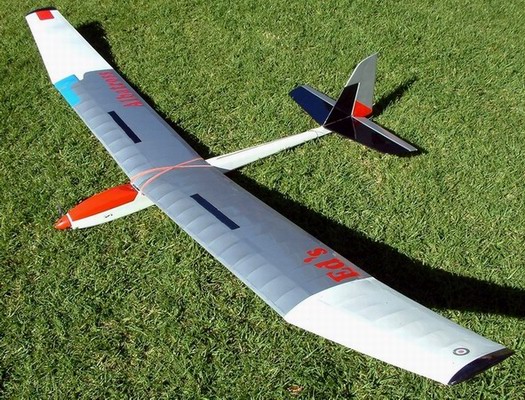
This is the BEFORE picture. A newly completed Albatross. Circa 1998.
The Albatross is a
2.5 metre soarer that is very easy to fly, thermals excellently and is
ideal for training new pilots. This one was built with pull-up air brakes.
Ostensibly for rudder and elevator control, the pull-up brakes require
a third channel.
This particular plane has been used to train 4 beginners and now looks
a lot more worn out than shown here. The canopy was the first to go courtesy
of the main former forward of the wing.
After some near-terminal
crashes recently I was considering binning the old alby. The albatross
design suffers two particularly weak spots in the fuselage:
The rubber band hold down shaft at the
rear of the wing and
Just in front of the tail assembly.
A little sentimentality stopped me from committing the poor alby
to death!
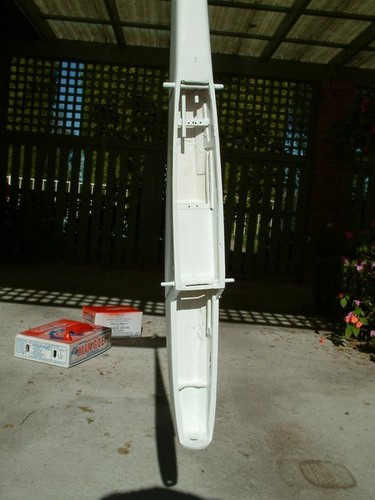
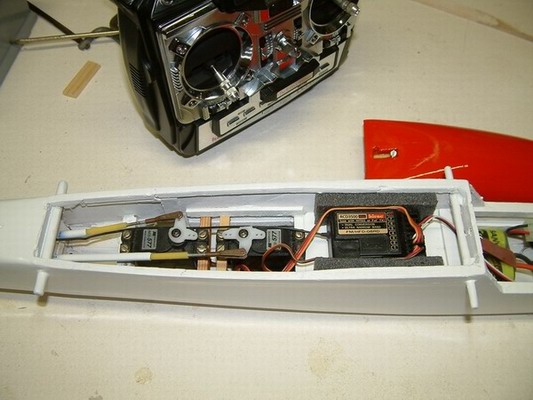
This picture shows the body gutted and refurbished to take electric equipment
I already had in stock.
The original canopy went to canopy heaven in the sky some years ago. This canopy is all block balsa, cut and shaped to suite the electric layout. A very strong set of plastic clips were added to keep the canopy in place. A slide lock from brass tube, push rod inner and a small screw made a great lock.
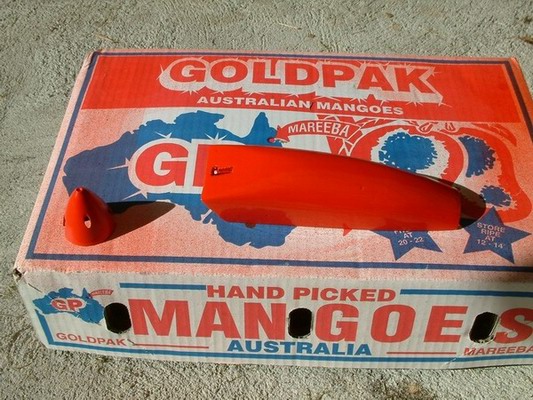
Propeller spinner 8" X 4.5" sprayed the same colour as the canopy.
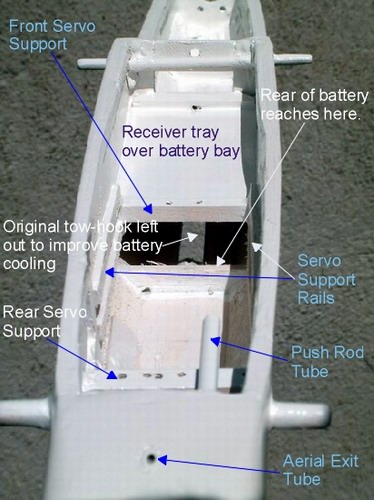
This
picture illustrates the changes made below the wing.
The combination of battery, hard up against the servo support, and the
motor/propellor, provided perfect balance for flying this plane. No additional
weight had to be added.
Adding the battery tray floor over the battery not only provided the space
for the receiver but also improved the torsional strength of the body,
greatly reduced since removing a few formers.
Two standard servos, for rudder and elevator, easily fit in the space
at the rear.
The neat aerial exit tube shown takes minutes to add and keeps the aerial
out of harm's way.
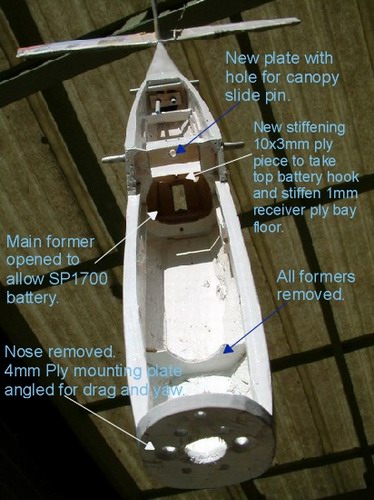
Three major operations were carried out here:
The banged up old nose was hacked off and replaced with a 4mm ply mounting plate correctly angled down and to the right to minimize drag/thrust coupling (upward) and yawing to the left from prop wash.
All old formers were removed to make for ease of motor mounting and insertion/removal of the battery.
The main former was opened out to allow an SP 1700 battery to fit through - see later photo.
A small canopy retainer bar was added at the top of the main body former.
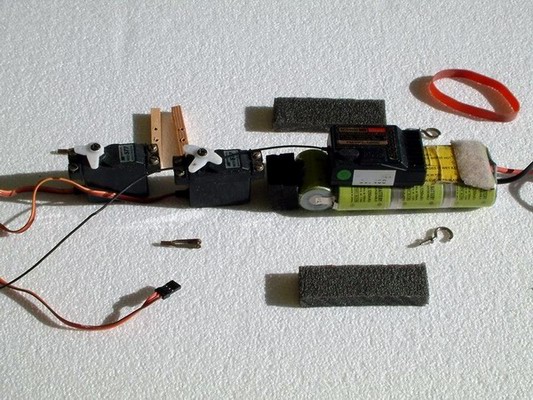
Two standard servos.
Hitec receiver - use the thinnest you can lay your hands on. There is not a lot of room here.
Battery below receiver.
Note the small cup hooks and rubber band used to hold the battery firmly in its bay.
Note the packer on the left end of the battery pack. This is to bulk the length to the same as an SP1700 battery, also used in this plane. The packer ensures that the COG balance is maintained and that the rubber band retainer will hold the battery tightly in its bay.
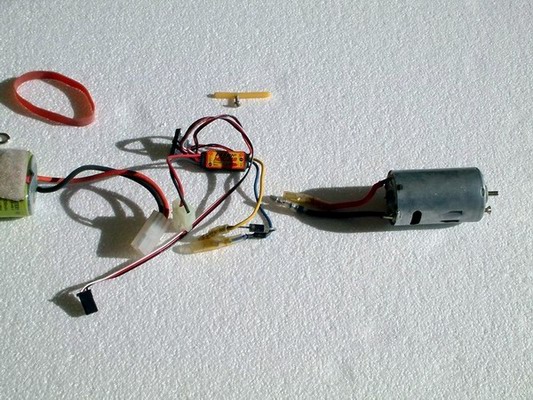
Equipment
below the canopy:
$10 can motor!
20amp controller.
Note the canopy locking pin out of push rod and screw.
Canopy
area assembly:
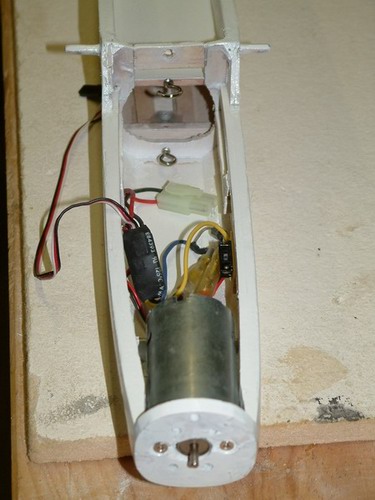
Motor and controller in place. Note the cooling holes
in the mounting plate. The right motor offset is quite obvious here.
Note the cup hooks in place over and under
the battery bay.
The lower cup hook must be squeased nearly shut to
prevent the rubber band jumping off during battery slide into position.
Make sure the receiver is firmly held in place with stiff foam etc.
Feed the receiver aerial out through the tube at centre rear.
Pack servo wiring up against receiver.
Note: The front servo is front fixed while the rear one is rear fixed. There are two sliding supports which then enable easy installation of the servos.
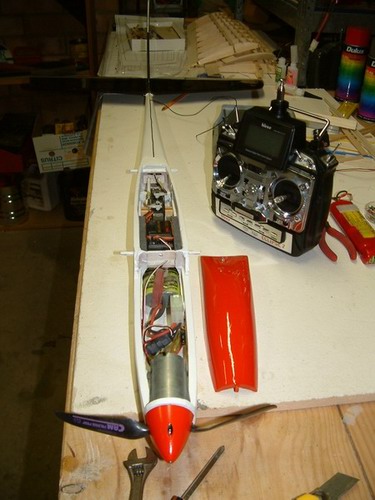
Note the band holding the battery in place.
NICE RADIO!!
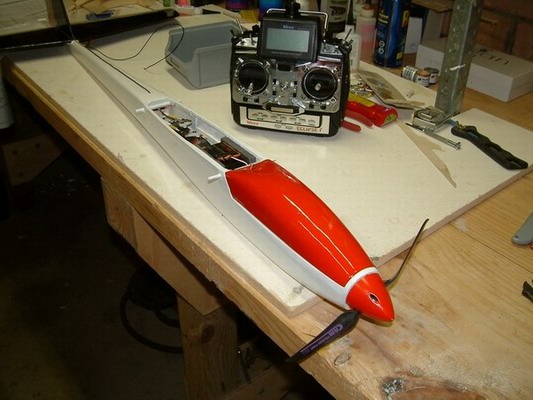
The Alby is Reborn!
Fully rigged and
ready to go.
The very first flight lasted 27minutes.
Even on a still evening using an SP 1250 battery I get 18 minutes run
time!
The longest flight so far has been 65 minutes and even then I was forced
to land - 'she who must be obeyed'
was calling me for lunch!
Remarkably, the flight characteristics for this Electrified Alby are
farely similar to the glider's original behaviour. This plane will not
give you horrible frights by dropping out of a turn when close to the
ground. To boot, the added weight gives the plane extra penetration
into any wind.
I strongly recommend this as a first step into electric flight! The long duration flights also make this an excellent combination for training new fliers.
NOTE: The modest equipment shown above will not power the Albatross around the sky like a top flight F5B grunt machine. Expect 30 to 50 seconds to normal bungee launch height.
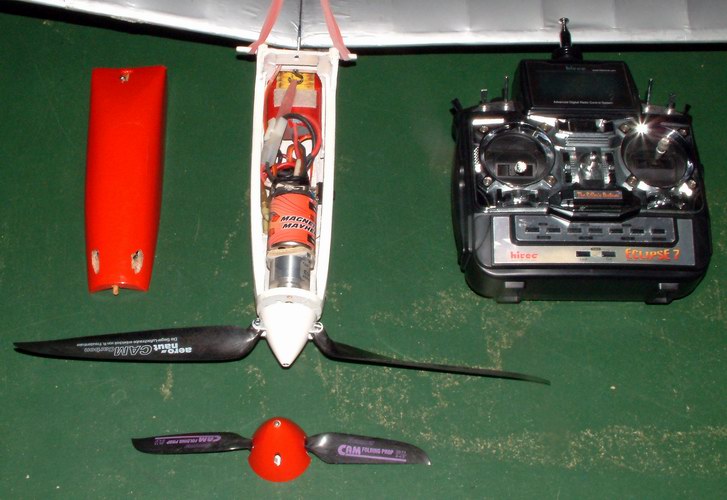
Stop
Press!! 11th-Sep-2003
The Alby has been upgraded again and is now equipped
with:
1) CAM CARBON 15" x 10" blades
2) 42mm white spinner
3) Aluminium centre piece
4) 4mm to 8mm Prop drive collet
5) 3.8:1 MPJ-8063 planetary gearbox
Total cost of the above items is $120
6) Magnetic Mayhem 600 sized motor (neodymium magnets and
22 winds)
7) 35 amp DC controller
Total cost of the motor and controller is $180

Note the difference in size between the original 8 x 4.5" prop and the new 15 x 10"!
While the can motor direct drive onto 8 x 4.5" prop managed sluggishly, the new arrangement gets the big Albatross to 150metres in less than 60 seconds.
Barrel rolls with
this aileron-less machine are now quite snappy.
Finding thermals is a real treat.
Note the additional
vent holes added, to the canopy and fuse sides, to cool the can motor
which really got quite hot.
The new Magnetic Mayhem motor is only moderately warm after a few strenuous
climbs!
Prop to gearbox equipment available in Australia from www.flyelectric.com